Workflows
Basic Tracking
The first graph worth building. Footage goes in, a solved camera and point cloud come out.
Start here. Once you've done this once, the rest of the add-on makes a lot more sense.
The Graph
Footage
  -> Convert Footage        -> Import as Footage
                            -> Auto Track
                            -> Output 3D
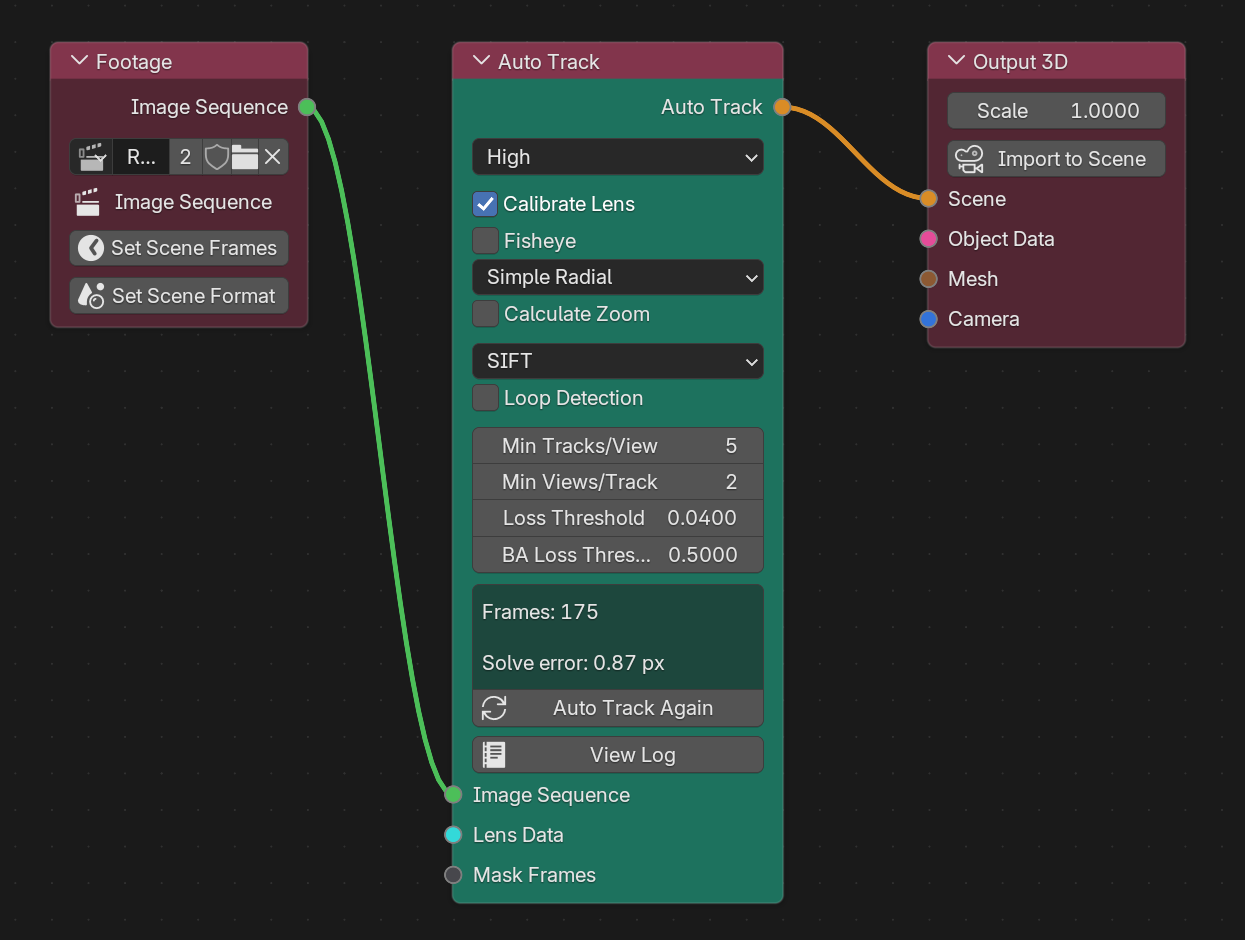
Steps
- Add a Footage node and pick your movie clip.
- Add Convert Footage, connect it, and press
Convert, thenImport as Footage. You get a new Footage node pointing at frames on disk. - Add Auto Track and connect that node's
Image Sequenceto it. - Press
Auto Track. It finds features, matches them across frames, and solves. - Add Output 3D, connect the
Auto Trackoutput to itsSceneinput, and press it.
You should now have a solved camera and a point cloud in your Blender scene.
Converting to frames first is worth the wait: solving reads individual frames thousands of times, and that is far faster and more reliable from separate files than from a compressed video.
Importing Files covers the whole input side in detail: video and EXR conversion, frame numbering, cropping and resizing, matching your scene to the footage, and the other input nodes.
Tripod Shots
If the camera only rotates and never moves, there's no parallax, so there's no depth to
solve. Use Tripod Track instead of Auto Track. It solves rotation only and connects
to Output 3D: Camera.
After The Solve
| What you want | Node to use |
|---|---|
| Throw out high-error points | Refine Cloud |
| Improve a weak solve with hand-tracked markers | Enhance Auto Track |
| Split the camera, cloud and lens apart | Separate Track Elements |
| Build a dense cloud | Densify |
| Get the scene the right way up and the right size | Align Scene, in the 3D Viewport sidebar |
When It Doesn't Solve
If the solve fails, registers only part of the shot, or drifts, work down the ladder in Advanced Tracking. That page also covers lens calibration from grid shots and plumb lines.