Workflows
Importing Files
Get footage, photos and lens data into a graph, and set the scene up to match.
Everything starts in the Input menu. Press Shift + A in a Dope Track node tree and
it's the first section.
Footage
The Footage node loads a Blender movie clip. Press the folder icon and pick either a video file or the first frame of an image sequence.
The node tells you which one it got, and its output socket changes to match:
| Source | Output socket |
|---|---|
| Video File | Video |
| Image Sequence | Image Sequence |
That difference matters, because most nodes want Image Sequence.
Convert Video To Frames
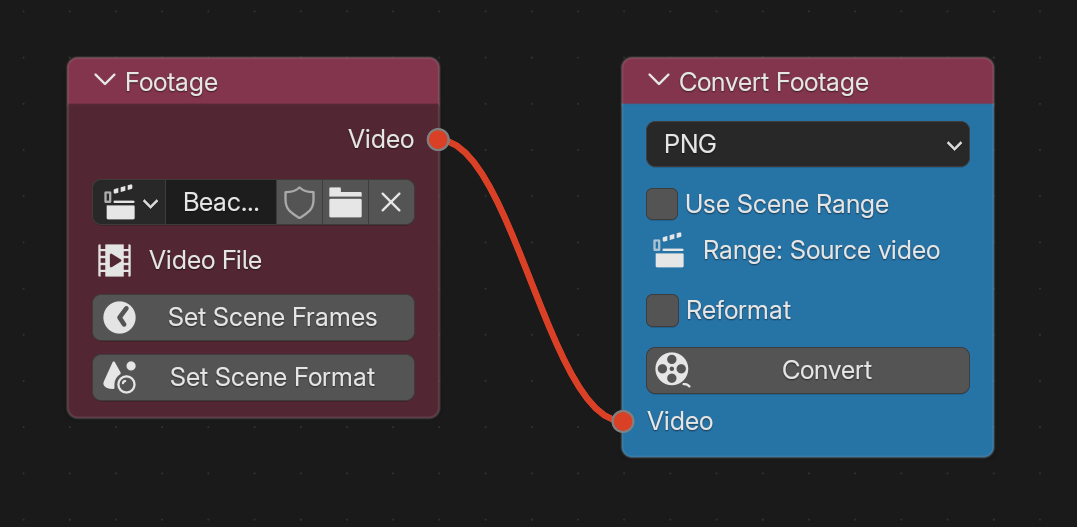
If you loaded a video, put a Convert Footage node after it and press Convert, then
Import as Footage to get a new Footage node pointing at the frames.
It's worth doing even though it takes time and disk space.
Solving reads individual frames thousands of times, in whatever order it likes. Video files are built for playing forward, not for jumping around: every seek has to decode from the nearest keyframe. With long GOP codecs like H.264 or H.265 that's slow, and with some of them you don't reliably land on the exact frame you asked for. A solve built on slightly wrong frames is subtly wrong everywhere.
Frames on disk fix that. Each one is a separate file, reading is instant, and frame 240 is always frame 240.
Convert EXR To PNG
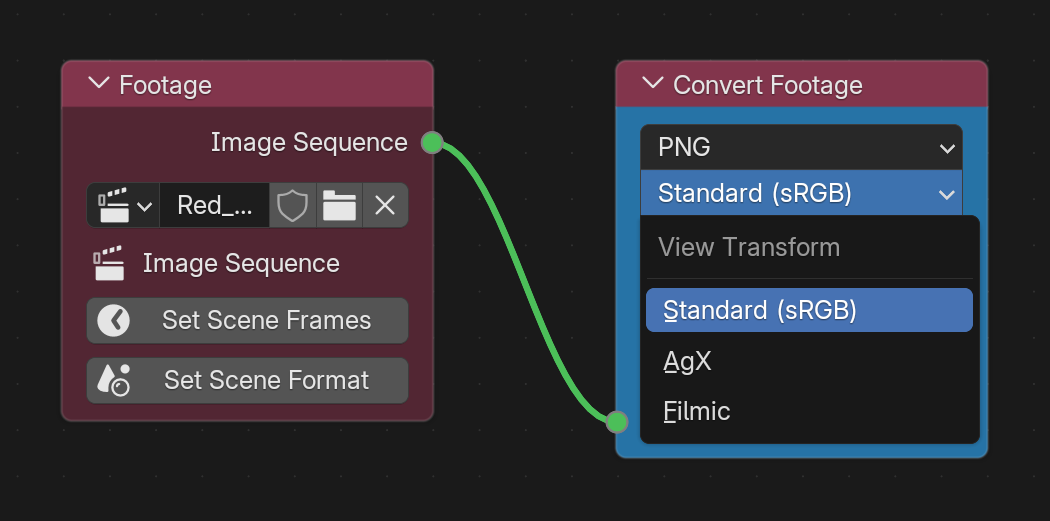
If your source is an EXR sequence, converting to PNG is usually worth it too.
EXR is a float format built for compositing, with far more precision than any tracker needs. Those files are large and slow to decode, and you'll read them thousands of times during a solve.
PNG is 8-bit, a fraction of the size, and much quicker to read. The tracker only cares about contrast patterns, so the extra range buys you nothing.
Keep your EXRs. They're the ones you'll comp with. The PNG conversion is working material for tracking.
When converting EXR to PNG or JPEG, you get a View Transform choice:
| Option | Use it for |
|---|---|
| Standard (sRGB) | A plain sRGB encode. Neutral, and the right pick for tracking. |
| AgX | Matches Blender's default viewport look |
| Filmic | Matches the older Filmic look |
Stick with Standard unless you want the frames to match what you see in the viewport.
Preserve Start Frame
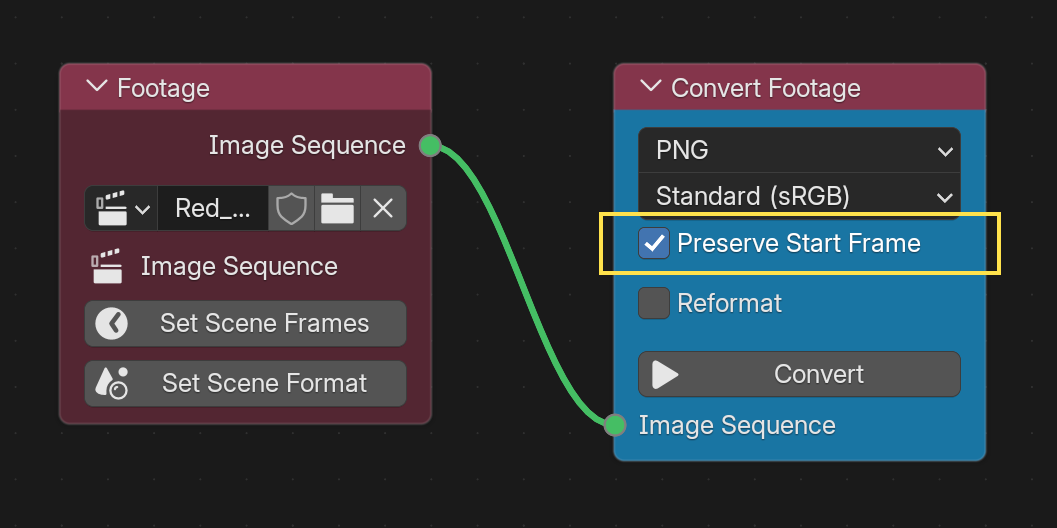
Sequence conversions renumber output frames from 1 by default, and that's usually what you want.
Some exports bake the camera's timecode into the filenames. A DaVinci render from an R3D
can start at something like shot_00086400.exr, and if you keep that numbering the
imported clip sits at frame 86400, thousands of frames off the end of your timeline.
It's still there, you just can't see it without scrolling a long way.
Turn Preserve Start Frame on when the original numbers matter. That's usually because a pipeline expects them, or you're delivering frames back to someone who counts frames the same way the camera did.
Leave it off and your converted sequence starts at 1, which is what Import as Footage will place at the beginning of your timeline.
Reformat
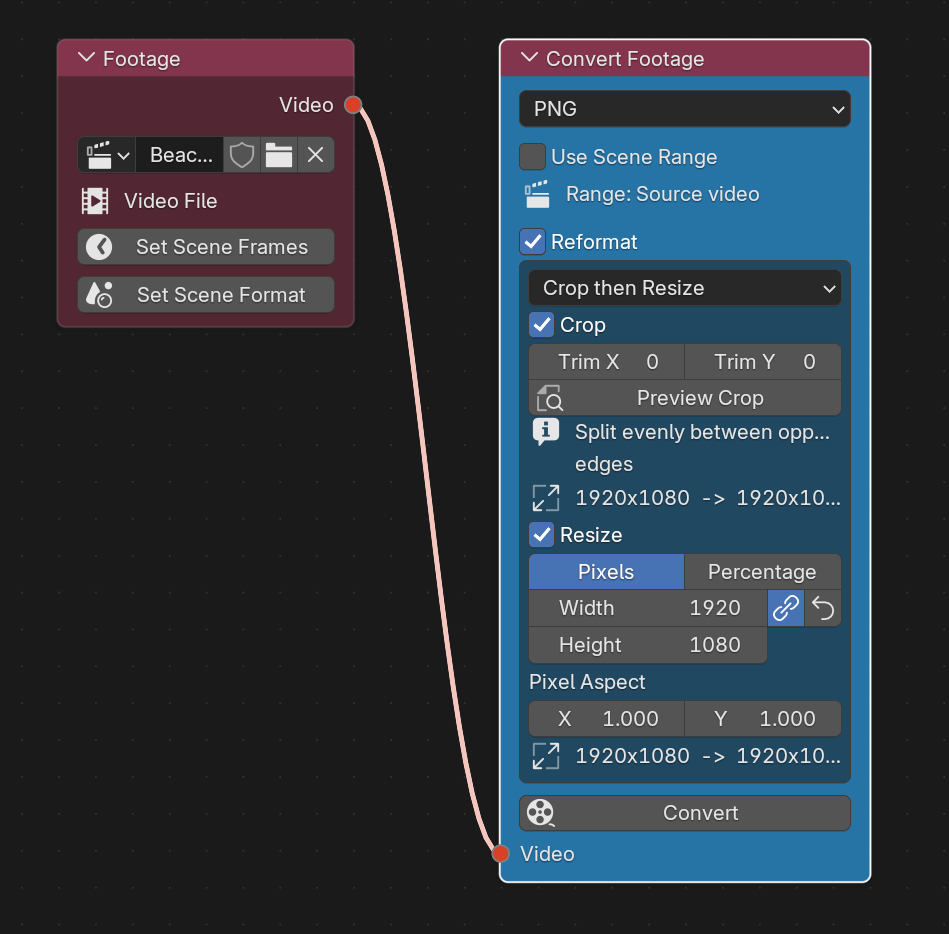
Convert Footage has an optional Reformat section that reshapes frames as it writes them.
Crop trims pixels off the edges without resampling. Trim X and Trim Y are total
amounts, split evenly between opposite sides, so trimming 10 from a 1920-wide frame
takes 5 off each side and leaves 1910. Use it to cut black borders or a blanking strip.
Resize scales to a target size. Work in Pixels for an exact number or Percentage
to scale by a factor. The Link toggle keeps the aspect ratio while you type, and the
reset button puts the source size back.
The main reason to resize is speed. A 6K plate solves slowly, and half resolution solves much faster while still tracking the same features. The solve is in normalized coordinates, so it stays valid at any resolution.
Pixel Aspect handles anamorphic footage. Enter the source pixel aspect and the squeeze gets baked into the pixels, so the output is square-pixel and everything downstream can treat it normally.
With both crop and resize on you also get an Order choice, since cropping then scaling gives a different result from scaling then cropping. Each section shows its own before and after size so you can see what's happening.
Match The Scene To Your Footage
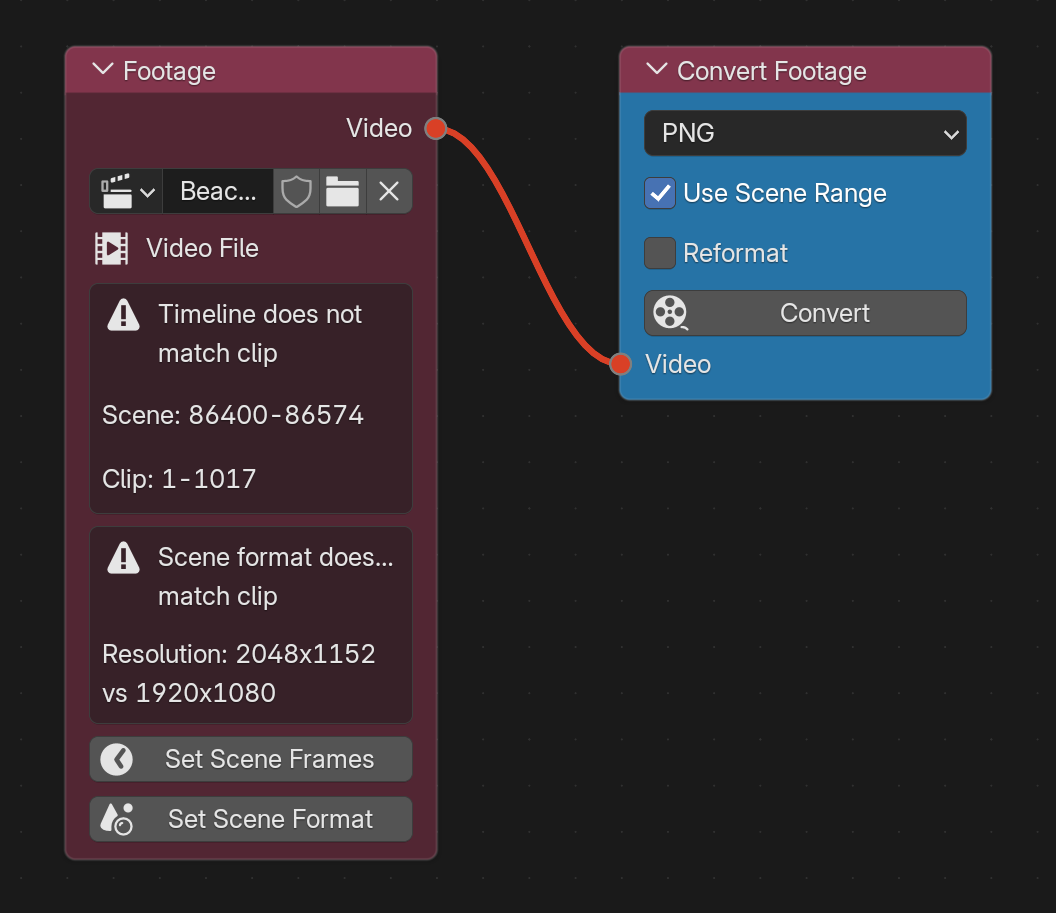
The Footage node checks your scene against the clip and warns you when they disagree. Two separate things, with a button for each.
Set Scene Frames sets the scene's frame range to the clip's. For image sequences it
trusts the numbers in the filenames rather than Blender's frame_start, which defaults
to 1 no matter what the files are called. That matters because solves and imports
keyframe on the file numbers.
Set Scene Format matches the scene's render resolution, pixel aspect and frame rate to the clip.
Do both before you start. Render resolution decides how your camera frames the shot, so a scene at 1920x1080 with 4K footage will not line up. Frame rate mismatches show up as CG that slides against the plate over time, which is a miserable thing to debug later.
The warnings show the actual numbers on both sides, so you can see exactly what differs before pressing anything.
Images Folder
Images Folder points at a directory of stills instead of a sequence. It's for photogrammetry and lens calibration, where the images are separate photographs rather than frames of a shot.
Every image in the folder is used. The node counts what it found, so if the number looks wrong you know before running anything.
It reads JPEG, PNG, TIFF and BMP, plus camera RAW: CR2, CR3, NEF, ARW, DNG, ORF, RW2, RAF and more. RAW files are decoded for you, so you can point it straight at a card dump without converting first.
Output is Images, which feeds Photogrammetry and
Lens Grid Calibrate.
3DE Lens Import
3DE Lens Import reads a 3DEqualizer lens file and shows you what's in it: focal length, filmback, lens model and the distortion coefficients.
It's a reference node with no sockets. Use it when someone hands you a lens calibration from 3DEqualizer and you want to see those values, or copy them into a Lens Distortion node by hand.
Manual Tracks
Manual Tracks brings hand-placed Blender markers into the graph, and Combine Manual Tracks merges several of those streams into one.
Hand tracking is how you rescue a solve that automation can't finish, and how you link geometry to a plate. See Advanced Tracking and 2D/3D Constraints.